Showing posts with label tutorial. Show all posts

Wednesday, October 27, 2010

Snowgirls (FTU)


Tube Alan Stevens Here
Scrapkit Snowgirl by Amanda Kelleher Here
Mask 132 by Weescotslass Here
~~~~~~~~~~~~~~~~~~~~~~~~~
Outside Effects used
Eyecandy 4000 Gradient Glow
~~~~~~~~~~~~~~~~~~~~~~~~~~~~~~~
drop shadow settings:
vertical and horizontal: 1
opacity: 75
blur: 3
color: black
new 600x600
open ak_free_snowgirl(31)
change foreground to pattern chose the paper you just opened
settings:
angle: 0
scale:125
Load save mask/load mask from disk: wslmask132
merge group
open ak_free_snowgirl (20)
with magic wand select inside left frame
selections modify expand by 3
copy and paste paper ak_free_snowgirl (20) as a new layer
selections invert delete
drag layer below frame
do the same with the right side of the frame but use paper ak_free_snowgirl (29)
On ak_free_snowgirl (20) and ak_free_snowgirl (29)
effects/texture effects/blinds
these settings:
width: 3
opacity 47
color: #ffffff
horizontal: unchecked
light from left/top: checked
Open tubes
click inside right frame
selections/modify expand by 3
copy and paste 1st tube
selections invert delete
do the same for the left frame
drop shadow both tubes
add tubes again and resize and place
for now close these layers off
open ak_free_snowgirl(45) and place above frame layer
duplicate this layer
click on duplicated layer and merge down (this will make the ribbon less sheer)
with selection tool on rectangle draw small rectangles on the side of the frames (we will delete the excess ribbon)
hit delete after placing the rectangles
select none
open ak_free_snowgirl(12)
copy and paste as new layer above mask layer
resize 70%
free rotate 90 degrees and make sure right is checked and place (use my tag as reference)
eyecandy 4000 gradient glow with these settings
color tab
medium (use default color)

Monday, September 20, 2010

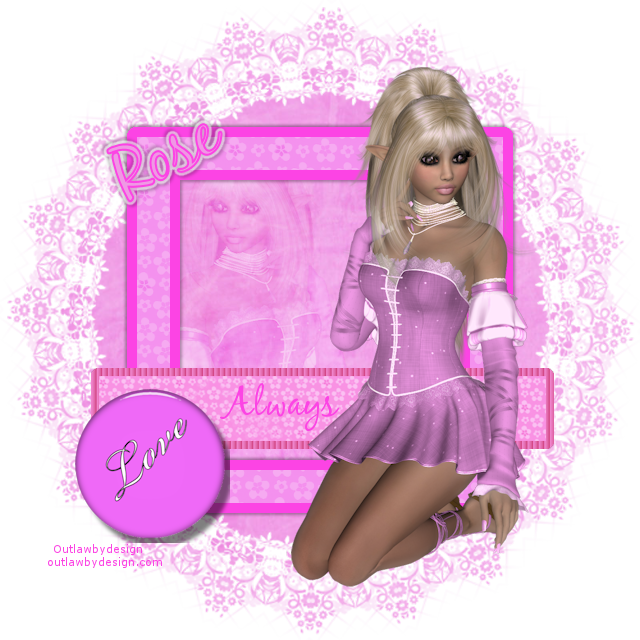
FTU Love Always Tut


Mask Here
Totally cute scrapkit from Chrysi and you can get it here
Tube from Outlaw by Design Here

New Raster Layer>800x800
Open any paper (I chose pink)>Copy/Paste onto blank canvas
Layers>Load/Save Mask from Disk> sg_stencil-flowered-circle>invert transparency
Image>Resize 80%, resize all layers unchecked
Open any frame>Copy/Paste above mask layer
Effects>Drop shadow with these settings:
    Vertical: 2
    Horizontal:2
    Opacity:30
    Blur: 4
Repeat Drop shadow but change vertical and horizontal to -2
Open any flower border>copy and paste above frame layer
Image> Rexize 80%
Move flower border near bottom of frame (look at my tag for reference)
Open any button>Copy and Paste above flower border
Image>Resize 40%
Move button to left bottom corner of frame (look at tag for reference)
Open tube>Copy and Paste and resize if need be
Move tube to the right and place this layer above the ribbon layer
Duplicate tube>Mirror
Move duplicated tube layer under frame layer and reposition tube
Click inside frame with magic wand
Selections>Modify>Expand by 8
Selections>invert
Make sure you are on duplicated tube layer and then hit delete
Selections>Select None
Double click on duplicated tube layer
Change blend mode to soft light
Click on ribbon layer>then click on text tool
Write Always
I used these settings
    Font:BlackJack
    Size:14
Convert Always layer to a Raster layer
Add your name and copyright.

Monday, September 13, 2010

Colors of Fall Tut

Bear with me as this is my first tut. :) 
This tut assumes you have basic knowledge of PSP. 
I used PSP X3. 

Scrapkit Here
Tube Here
Mask Here
Mura Meister Clouds 2.2 Here

new image 500x500
open dbv fall paper>copy/paste
Mask from Disk sg-stencil-flower circle
merge mask group
open dbv fall element (24)>resize to about 80% (make sure resize all layers is UNCHECKED)
add a drop shadow to element (24)
drop shadow settings: vertical: 3
              Horizontal: 3
              Opacity: 49
              Blur: 4.0
              Color:Black
Redo drop shadow but change vertical and horizontal to -3
Click inside element (24) with magic wand
selections>modify>expand>4
new raster layer>change background to white on materials palette
flood fill tool>click inside selection
Drop opacity to about 81>deselect
On white image we just created go to
Selections>select all>float>defloat>mura meister clouds
these settings:

Colors for light: BG #e26220
              FG:#ffffff
          BG:#d61900
Move clouded layer under element (24)>deselect
click on element (24)
open dvv fall element (2)>copy/paste as new layer>resize 50%
Move to lower left
Open dbv fall element (3)>resize to 50%>move to upper right of element (24)
open tube (if using the same one as me resize by 40%)
place tube in between apples and tag
Open DBV fall element (22)>copy/paste>resize 90%
Move DBV fall element (22) to bottom of DBV element (24)
click on raster 7>right click>arrange>send to bottom
Merge visible
add name and copyright